Written by Jayelah Bush, BScN
Medically reviewed by Dr. Natacha Montpellier, ND, B.Sc.
Article Courtesy of Fullscript
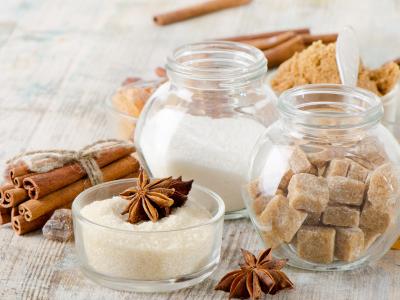
Bone broth (stock) is a liquid made from simmering bones in water over a period of time. Drinking bone broth on its own, or using it as a base for soups and other dishes, is a great way to get its health benefits. Bone broth contains many important nutrients, including amino acids, collagen, and protein. (11) Scientific evidence suggests that the nutrients in bone broth may support digestive health, joint health, a healthy immune system, and more.
Keep reading below to learn about bone broth benefits, and how to make your own bone broth at home.
Amino acids, the building blocks of proteins in our cells and tissues, are one of the main components of bone broth. Proteins are used within the body to perform many bodily functions as well as repair, build, and grow bodily tissues. (7)(15) Research indicates that the components of bone broth can benefit the body from head to toe, from mental health to skin health.
Bone broth is a good source of the amino acid glycine, which plays a key role as a neurotransmitter (messenger between nerves and cells), influencing brain development, motor skills, and behavior. (4)(11)(18) Glycine also has anti-inflammatory and antioxidant properties. Research demonstrates that glycine can decrease neurological (brain and spinal cord) damage related to oxidative stress in mice. (22) Cellular damage related to oxidative stress can negatively affect the nervous system, potentially playing a role in the development of neurological diseases such as Alzheimer’s disease and Parkinson’s disease. (19)
Beef bone broth is rich in the amino acid glutamine, the most abundant and widely used amino acid in the body. (7)(11) About 30% of total body glutamine is used by the digestive tract to support intestinal health. Its functions include supporting a healthy inflammatory response, maintaining the intestinal barrier, and regulating intestinal cell death. (10) In gut health conditions such as inflammatory bowel disease, glutamine levels are significantly lower than healthy individuals. (8) Regularly drinking bone broth may help increase glutamine levels to support digestive health. (11)
Not only is glutamine a key nutrient for a healthy gut but also a healthy immune system. Leukocytes (white blood cells) require glutamine for proper function. During illness or injury, glutamine is used by the immune system just as much, if not more, than glucose (sugar), the main source of energy for the human body. Glutamine can be created within the body, but levels are often insufficient during times of illness. Research indicates that supplementing with glutamine before or after a major health event, such as bone marrow transplantation, radiation treatment, or surgery, may be beneficial for immune health. (7)
Joint pain related to osteoarthritis (joint damage) is one of the most common causes of chronic pain, affecting millions of North Americans. (6)(17) Osteoarthritis occurs when joint cartilage (tough, flexible tissue) degrades, causing bones to scrape against each other as the joint moves. This can eventually cause pain and negatively impact all areas of connective tissue, including bone, cartilage, ligaments, and tendons. (5)(13) Collagen is the main structural protein found in skin and other connective tissues, such as cartilage. Collagen can be synthesized in the body using amino acids, or obtained from dietary or supplement sources. (23) Consuming more collagen and collagen-building amino acids and nutrients may be one way to promote bone and joint health. (2)(17)
Bone broth is a good dietary source of collagen and collagen-building amino acids. (11) Clinical and animal research has demonstrated that supplementing with collagen extract derived from chicken bones, like that from chicken bone broth, may be effective for decreasing joint pain. (12)(20)
Skin, the body’s largest organ, contains up to 70% of collagen, which plays an important role in maintaining skin structure and elasticity. (3)(21) Aging reduces collagen production within the body, which can weaken skin elasticity and strength, causing the skin to become thin, dry, and wrinkled. (3) Research suggests that collagen is a major component in the “anti-aging” of skin. (21) Bone broth collagen may be just what your skin needs for a youthful glow.
Bone marrow is the fatty, soft, spongey tissue found in the center of most bones. Marrow bones (e.g., femur) are good choices for bone broth as they contain high amounts of collagen and amino acids. As a fatty tissue, bone marrow is also a rich source of vitamin D, which is stored in fat. One reported case has noted that regularly drinking high volumes of bone broth, notably beef bone broth, may lead to hypervitaminosis D (excess vitamin D). (16) Hypervitaminosis D can lead to hypercalcemia (excess blood calcium) which can cause serious health complications, including fragile bones, fatigue, and vomiting. (14)
In addition to the important amino acids and key nutrients found in animal bones, there may also be trace amounts of heavy metals, such as lead. However, research indicates that the levels of heavy metals present in bone broths are not considered dangerous, falling within the Maximim Residue Limits (MRLs) established by the U.S. Department of Agriculture. (9)
Making bone broth at home on the stovetop or in a slow cooker is the best way to get its amazing health benefits. A study reported that store-bought bone broth was found to be lower in all amino acids than the self-prepared varieties. (1) While it may sound daunting, making your own bone broth is actually fairly simple.
Simple bone broth
Prep time: 15 minutes Cook time: 18-24 hours
Total time:~24 hours
Servings: 4 servings
Notes: Although not necessary, roasting your bones before simmering can improve the flavor of the broth.
Limit toxin exposure by using bones from organic, sustainable, grass-fed, pasture- raised, and/or free-range sources.
Add vegetables, herbs, and spices to enhance flavor and nutrients.
Ingredients
2-4 lbs (1-2 kg) chicken or beef bones
1 gal (4 L) water
2 tbsp (30 mL) apple cider vinegar
Preparation
The health benefits of bone broth come from its rich nutrient content, including the protein collagen and its related amino acids. Consuming bone broth may support a variety of health facets, including mental health and joint health. Bone broth is mostly considered safe, but may contain trace amounts of heavy metals and can lead to vitamin D toxicity if consumed in excess. Sourcing high-quality animal bones and making bone broth at home is one way to limit toxin exposure and increase the nutrient content. If you’re a patient, consult with your integrative healthcare provider before making any major changes to your diet.
One of my favorite holiday dishes is my mom’s sweet potato pie, a side dish from deep in the South that is resplendent in butter and sugar. Yummy—but not healthy despite the main ingredient being a very nourishing sweet potato. So I set out to create a version of the dish that was Alpha Gal friendly and with greatly reduced sugar. The final dish is every bit as wonderful—but now a guilt-free treat. This process can be applied to any of your favorite recipes, remember it’s ok to fail in the experiments —that’s how we learn!
Back to the recipe redo…. there were two main ingredients I was concerned about for health reasons: sugar and butter.
It is important to undertake this process in steps and understand a little about the “chemistry” of the dish:
The butter/fat adds to the flavor and makes the nutrients in the sweet potato more readily absorbed by the body—but 2 sticks for the size of the recipe is excessive.
Sugar isn’t just a sweetener but sometimes acts as a catalyst. For example when whipping cream—the addition of sugar helps the cream form better though less is needed than most people realize, so we cannot completely remove some ingredients without consequences to the final product!
I experimented with reducing the butter first, could I cut the butter in half and still have a good version? The answer was yes—1 stick of butter tasted identical to 2 sticks in the final product. So then I halved that again—½ stick butter—and it was a little dry (not so yummy). So I added some unsweetened apple sauce and that worked! Then I replaced the ½ stick of butter with an equal amount of coconut oil—success—no mammal and a nearly identical flavor. Next step, the sugar…
The original recipe used 2 C of sugar in total! I cut that in half…and it wasn’t noticeably less sweet, especially with the apple sauce. Next, I made it with even less (½ C) and it was a little flat compared to the original recipe.
So what to do?
I increased the cinnamon then added cardamom and clove to the mix and increased the applesauce and amount of sweet potato. The extra spices did the trick—the nature and flavor of the dish were preserved and the sugar was reduced by ¾! Now we can enjoy this dish without the sugar rush. I have also experimented with a monk fruit-based sweetener replacing the ½ C sugar making a dish that is safe in moderation even for those with diabetes! Don’t tell my mom but sprinkling some chopped nuts on top of this is a wonderful addition- pine nuts, macadamia nuts and walnuts all work beautifully with this recipe! And, nuts are good for your body and brain!
Here is my final "Healthy" version of Southern Sweet Potato Pie!
I hope this helps inspire you to take some of those family favorites and tinker with them to make them better for you. Pancakes, cookies, and pie crusts often lend themselves well to a gluten-free makeover and it’s worth the work to figure out which options work best. For example, I love shortbread and the gluten-free flour mix that rocks for pancakes but was a disaster for shortbread— but almond flour was even better than the original!
Cooking is a special kind of alchemy, one that transforms humble ingredients into nourishing and flavorful dishes. Food is the first medicine, but it doesn’t need to taste bad! If you need inspiration, check out our Facebook Group, Raja Wellness Ways to Health, and search #realfoodfast or browse the recipes on our website.
Yours in Wellness,
Jenny-Marie
Clears summer heat and stomach heat. Generates body fluid and relieves thirst. Translation: helps to alleviate/prevent dehydration, reduce inflammation, regulate digestion, and offers a way to use up something we would normally discard.
Watermelon can be a bit of a sugary treat, so be careful not to overdo it with the sweet part of the fruit, a little of it is fine—it has a number of electrolytes!
INGREDIENTS
• 500 g (17.06 oz) watermelon peel
• 1 tsp salt
• 20 g (0.71 oz) garlic, minced
• 1/2 tsp sugar, to taste
• 1/4 tsp salt (natural sea salt is preferred) to taste
• 2 Tbsp sesame oil
• 3 tsp vinegar
Makes 3 servings
Take the white portion of the watermelon peel and cut into 2-inch by 1/2-inch strips.
Combine the strips of watermelon peel and salt in a bowl. Mix with hands for 5 minutes. Then rinse under cold water to remove the salt. Place peels on paper towels to dry.
Combine garlic, sugar, salt, sesame seed oil, and vinegar in a bowl. Mix with a whisk. Add watermelon peel and toss until evenly combined. Marinate for 1 hour before serving.
Cold Cucumber Soup
1 large chilled English cucumber
1 clove garlic, minced
1 green onion, chopped
1 tablespoon chopped fresh red chili pepper (optional)
1 ½ teaspoon salt
1 teaspoon soy sauce
2 teaspoons sugar
4 teaspoons vinegar
5-6 cherry tomatoes, sliced (optional)
1 cup cold water
7-8 ice cubes (1 cup)
1- 2 tablespoons sesame seeds, ground
Directions
1. Cut the cucumber into 3-inch long thin matchsticks/slices and put them into a chilled mixing bowl.
2. Add your garlic, green onion, and red chili pepper (if used).
3. Add the salt, soy sauce, sugar, and vinegar. Mix well, gently with a spoon until the salt and sugar are well dissolved.
4. Add the water, ice cubes, and the sliced tomato (if used), and gently mix with a spoon. Let ice cubes dissolve.
5. Spoon 4 portions into individual bowls, sprinkle sesame seeds on top, and serve right away with rice (optional) on the side.
It can be served with a side of rice, but it does just fine on its own as a refreshing, easy-to-digest, and healthy summer soup!
I was in search of a little sheet pan inspiration recently, and found a recipe that I liked but lacked
a few ingredients—so I improvised and was thrilled with the results. This recipe is nutritious,
easy to make, and alpha-gal friendly. Don’t feel shy about using different vegetables or adjusting the ingredients to your liking—experimentation makes food fun!
Ingredients:
1 lb raw tiger shrimp
2-3 tbsp olive oil
1 bunch Kale, roughly chopped
3/4 red onion, cut into thin slices
1 zucchini, sliced into thin quarters
3 fresh garlic cloves, minced
1 lemon, cut into halves
6-7 kalamata olives, sliced
Salt, pepper to your liking (I like to go heavy on the pepper) Italian seasoning to taste (I like to add some additional oregano OR basil—but not both)
Marinated artichoke hearts and cherry tomatoes also make a nice addition
Directions:
Preheat oven to 425°F
In large bowl, mix kale, red onion slices, kalamata olives, zucchini, 1⁄2 of the minced garlic,
lemon juice from 1⁄2 lemon. Drizzle lightly with olive oil, salt and pepper, and a couple of dashes of the
herbs. Toss well.
In a separate bowl, add peeled and deveined tiger shrimp (pat w/ a paper towel to remove
moisture), the remaining garlic, juice from remaining half of the lemon, remaining olive oil, salt
and pepper to taste, and a couple dashes of the herbs. Toss.
While your shrimp is marinating, add vegetable mixture to an 8x8 glass baking dish. Cover with
aluminum foil and cook for 8-10 minutes, then remove from oven.
Add just a light drizzle of olive oil to the dish, and add marinated shrimp. Cover in aluminum
foil and return to the oven for 6 minutes. Remove aluminum foil and cook another 8 minutes, or
until shrimp are pink and cooked through. Serve immediately and enjoy!
As mentioned, this dish is alpha-gal safe. If consuming dairy is not a concern for you, consider
topping with a few crumbles of feta cheese.
For even more delicious recipes, check out our Facebook Group, Raja Wellness Ways to Health where we also share more tips and inspiration for healthy living!
Follow Raja Wellness on Facebook and Instagram!
Follow Raja Goods on Instagram!
Source: BT Leigh's
Time to bring out the grill and try this amazing Grilled Trout recipe that’s “clean plate” approved!
Ingredients:
4 fresh trout filets, skin-on
1 bottle of Jalapeño Business
2 limes
1 lemon
A neutral oil, such as canola or grapeseed
Salt and Pepper to taste
Directions:
Heat your grill to 250 degrees. Make sure your grill grates are properly cleaned so the trout does not stick.
While your grill is heating, slice up one lime and one lemon. Make sure to slice the fruits fairly thin.
Lightly coat your trout filets in oil and season with salt and pepper.
Place the trout on the grill, skin side down. Next to the trout, place the citrus slices in approximately the same size as the filet - usually about 3 slices.
Take a brush and apply a thin layer of Jalapeño Business on the citrus and the fish.
Be careful to watch your fish. Trout will cook quickly on the grill and will be done when the flesh is flakey and white. This should be approximately 3 minutes. If its a bigger filet, be sure to flip it onto the citrus bed halfway through cooking. For a smaller filet, flip it onto the lemon-lime layer just before it finishes cooking. Be sure to brush the skin with some Jalapeño Business!
Serve immediately, and enjoy!
This is a great "set and go" chicken recipe using a slow cooker! Ground coriander adds a floral and citrus-y zest! You can use the chicken in many other dishes, get creative! Goes great with just a bed of rice, but also can be diced up for salads or on the side of a heaping plate of steamed fresh vegetables.
Ingredients:
1/4 Cup soy sauce
2 Tablespoons organic brown sugar
2 Teaspoons garlic
1 Tablespoon ginger
1 chopped yellow onion
1 Tablespoon balsamic vinegar
1 Teaspoon ground coriander
1 1/4 Pound chicken breast
2 sliced carrots
2 Cups cooked sushi rice (optional)
1 Tablespoon corn starch
1/4 Cup water
1/4 Cup diced cilantro
Directions:
1) In a slow cooker, stir together soy sauce, sugar, garlic, onion, vinegar, coriander, and salt and pepper. Add chicken and carrots, toss to coat. Cover and cook on low until chicken is tender, about 6 hours.
2) (optional) Cook rice according to package instructions.
3) In a small saucepan, whisk cornstarch with water. Ladle about half of the cooking liquid from the slow cooker into the pan; whisk to combine. Bring to a boil; cook until thickened, about 1 minute.
4) Serve the chicken with sauce and rice if desired, and garnish with cilantro.
Not only does bone broth provide a variety of health benefits, it’s also delicious and adds complexity and richness to various dishes when used as an ingredient. It’s easy to make, and is a great way to utilize vegetable and herb scraps!
Ingredients:
1 organic whole chicken (you can certainly just use the bones for bone broth, but I find using a whole chicken adds more nutritional value as well as flavor. I typically use the leftover cooked meat to make chicken salad)
2 tbsp Apple Cider Vinegar
Water
Salt (I recommend using a nutrient dense salt such as Gray Sea Salt)
In-season spring herbs and vegetables (I like to freeze my vegetable and herbs scraps and use those) You can use any variety you choose, but pick at least 3 different items to use. Consider using these springtime favorites:
Directions:
Add whole chicken to stock pot, cover with water. Add apple cider vinegar and salt (add a generous amount of salt). Allow to sit for 30-45 minutes with no heat—this allows the apple cider vinegar and salt to pull nutrients from the chicken.
Bring pot to boil and boil chicken for an hour. As chicken boils, remove “scum” from the surface using a large spoon.
Remove chicken from the pot and allow it to cool enough to handle. Remove skin, add back to pot. Separate the meat from the bones and add bones back to the stock pot and return to boil. Save chicken meat for chicken salad, sandwiches, or another quick meal.
Add your choice of spring vegetables and herbs (or scraps) to the pot. Cover with lid, reduce heat to low and cook for 16-24 hours. You may wish to add more salt, or even add a little lemon juice to the pot for flavor.
Remove bones from the pot, and strain broth. I prefer to add my broth to mason jars and once sufficiently cooled, refrigerate.
Enjoy a cup of bone broth on its own, use it as a soup base or for cooking pasta, as a flavorful and nutritious addition to a sauce, stew, or marinade. It is freezable as well—I like to add my bone broth to an ice cube tray and add a cube to pretty much whatever I’m cooking for dinner. The possibilities are endless and delicious!
With a few simple ingredients, you can put together a healthy, easy dinner the whole family will love. This dish is also alpha-gal friendly. So break out your apron, and enjoy a little time in the kitchen preparing something tasty!
I highly recommend telling the family the kitchen is off limits; prepare your favorite mocktail, and turn on your favorite podcast while you throw this together!
Preheat oven to 375 and prepare a 9x13 inch baking dish by lightly greasing the dish.
Heat 1 tsp olive oil in a skillet on high heat. Season chicken breast on both sides by lightly sprinkling garlic powder, onion powder, paprika, dried thyme (if desired), and salt and pepper. I’m not adding exact measurements here, we each have different palates. Just sprinkle until it feels right—but not too heavily. Add chicken to pan, cooking for about 2 minutes per side (until brown and slightly crispy).
While the chicken is cooking, whip up your honey mustard sauce.
In a bowl, combine ½ tbsp olive oil, honey, all three mustards, a shake of pepper, and white wine or white wine vinegar. Whisk together.
Move chicken to glass dish, and pour honey mustard mixture over it, flip and add more sauce. Make sure the chicken breasts are fully dressed in sauce.
Add a couple pats of vegan butter to the dish, and a couple of sprigs of fresh rosemary on top of the chicken.
Cover in aluminum foil and bake for 15 minutes.
Uncover and cook for an additional 20 minutes. Cooking time will vary depending on size and thickness of chicken breasts. Chicken tenderloins will take less time.
Serve with steamed broccoli or a side salad and enjoy!